Introduction
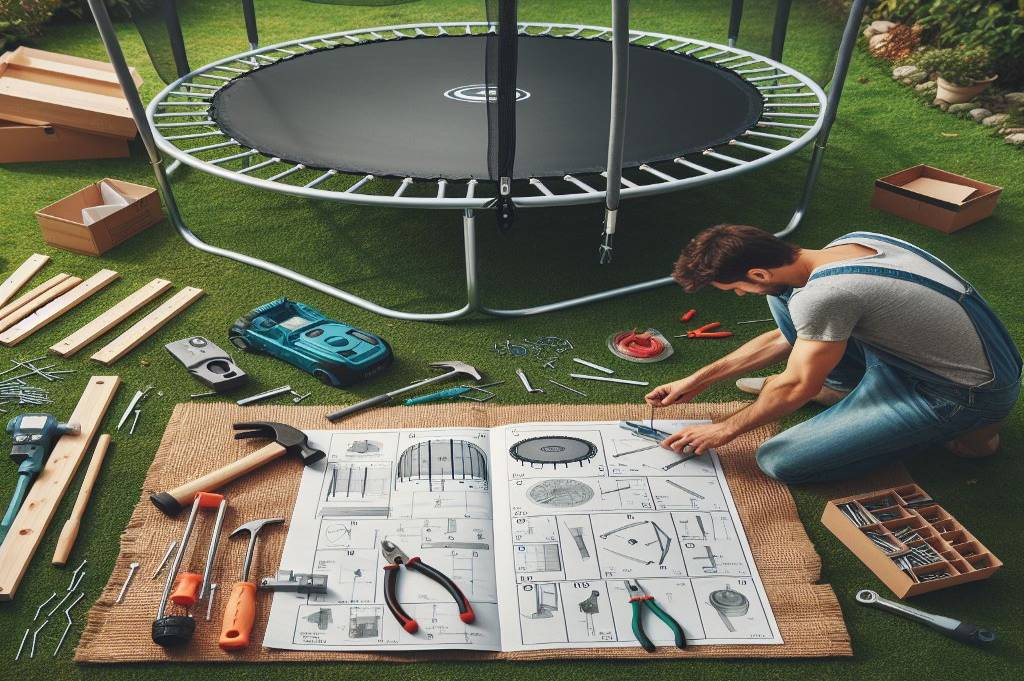
Welcome to the world of boundless joy and outdoor fun! In this step-by-step guide, we’re about to embark on an adventure that will not only elevate your backyard activities but also ensure a safe and thrilling experience for everyone involved. Today, we delve into the heart of bouncing success with our comprehensive guide on how to assemble a trampoline.
Why Trampolines?
Trampolines have long been a symbol of enjoyment and carefree moments. The thought of bouncing effortlessly through the air brings smiles to both young and old alike. Whether you’re a family looking to create lasting memories or a fitness enthusiast seeking an enjoyable workout, a trampoline can be the perfect addition to your outdoor space.
The Importance of Proper Trampoline Assembly
While the prospect of bouncing on a trampoline is undeniably exciting, it’s crucial to recognize the significance of proper assembly. A well-assembled trampoline not only guarantees a smoother and more enjoyable jumping experience but, more importantly, ensures the safety of everyone using it.
As we embark on this journey together, keep in mind that each step is carefully crafted to guide you through the assembly process smoothly. By the end of this guide, you’ll not only have a fully functional trampoline but also the confidence that comes with knowing it was assembled correctly.
Our step-by-step approach will cover everything from pre-assembly preparations to troubleshooting common issues. We’ll provide practical tips, highlight potential challenges, and offer solutions to make your trampoline assembly very simple.
Pre-Trampoline Assembly Preparation
Before we dive into the hands-on part, let’s lay the groundwork for a seamless and successful trampoline assembly process. Here, we’ll explore the essential pre-trampoline assembly preparations that will ensure you have everything you need to make your trampoline dreams a reality.
Gathering Tools and Equipment
The first step in our journey involves gathering the necessary tools and equipment. Here’s a checklist to ensure you’re well-prepared:
- Socket set
- Screwdrivers
- Rubber mallet
- Tape measure
- Level
- Power drill (if required)
- Helper (an extra pair of hands always comes in handy)
Having all the tools at your disposal will streamline the trampoline assembly process and minimize interruptions. Double-check the trampoline instruction manual to confirm the specific tools required for your model.
Choosing an Ideal Location
Selecting the right location for your trampoline is crucial for both safety and enjoyment. Consider the following factors:
- Flat Surface: Ensure the chosen area is flat to prevent wobbling and instability during use.
- Clearance Space: Allow sufficient clearance around the trampoline to avoid collisions with obstacles and ensure safe dismounting.
- Overhead Clearance: Check for overhead obstructions like tree branches or power lines. Aim for at least 20 feet of clearance above the trampoline.
- Ground Cover: Ideally, place the trampoline on grass or another soft surface to provide a cushioned landing.
Checking Trampoline Kit Components
With your tools and the perfect location in mind, it’s time to unbox your trampoline kit. Before diving into trampoline assembly, take a moment to verify that all components are present and in good condition. Refer to the instruction manual and cross-check the parts against the provided list.
By precise preparing for the trampoline assembly journey, you’re setting the stage for success. Now that you’ve got your tools, location, and components in order, it’s time to roll up your sleeves and move on to the next step—unboxing and inventory. Get ready to see your trampoline take shape!
Step-by-Step Assembly Guide
Now, it’s time to dive into the heart of the matter. Here, we’ll embark on the step-by-step journey of assembling your trampoline. Follow these instructions closely, and soon you’ll be on your way to bouncing success!
Unboxing and Inventory: Opening the Gateway to Excitement
The first step in your trampoline assembly adventure is unboxing the components and taking inventory. Lay out all parts according to the provided list in the instruction manual. This not only ensures that everything has been included but also familiarizes you with the components you’ll be working with.
Setting Up the Frame: Building the Foundation
With your inventory checked and confirmed, it’s time to set up the trampoline frame. Join the frame pieces according to the given directions. Use the recommended tools, and pay close attention to the alignment to ensure stability. This step lays the foundation for the entire trampoline structure, so take your time and ensure everything fits comfortable.
The trampoline assembly process kicks into gear as you connect the frame pieces. Follow the detailed instructions provided in your manual, ensuring that each piece slots comfortable into place. Take a moment to appreciate the synergy of these components – they are the backbone of your trampoline, supporting every jump and bounce to come.
As you progress, double-check the connections to guarantee stability. A stable frame is not only fundamental for safety but also enhances the overall performance of your trampoline. Tighten bolts and nuts securely, paying special attention to the joints where the frame pieces meet. Picture this step as laying a solid foundation for a skyscraper; your frame is the structural integrity that will withstand the test of countless bounces.
Confirm that the frame is level on the chosen surface. This attention to detail ensures uniform weight distribution, preventing any wobbling or tilting when in use.
Attaching the Springs: Adding the Bounce Factor
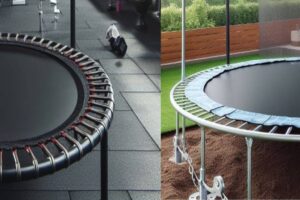
Now, let’s add some spring to your step! Attach the springs to the frame, following the guidelines in the instruction manual. This step requires a bit of physical effort, so be sure to distribute the tension evenly across all springs. This ensures a consistent bounce and minimizes stress on individual components.
The process of attaching springs involves a specific technique to ensure a smooth bouncing flow. Follow the instructions meticulously, securing each spring to the frame and jumping mat with precision. This step-by-step approach guarantees not only a secure attachment but also a trampoline that delivers an optimal and delightful bounce.
As you complete the spring attachment, perform a thorough inspection. Ensure each spring is securely fastened, and there are no loose or missing components. This final touch guarantees not only the safety of your trampoline but also the durability that will keep the bounce factor alive for countless adventures to come.
Installing the Jumping Mat: Where the Magic Happens
It’s time to see your trampoline take shape. Carefully position and attach the jumping mat to the frame. Ensure it’s centered and secured according to the instructions. The jumping mat is the heart of your trampoline, so attention to detail is key here.
As you secure the jumping mat to the frame, pay close attention to the attachment points. Ensure that each connection is tight and secure, preventing any sagging or uneven tension. The stitching on the mat is not just functional; it’s the thread that weaves together the seamless magic of every bounce.
Before the first bounce, conduct a thorough inspection of the installed jumping mat. Check for any signs of wear, tears, or loose connections. This pre-bounce ritual not only guarantees the safety of users but also sets the stage for a worry-free bouncing adventure.
Enclosure Net Installation: Securing a Safe Bouncing Zone
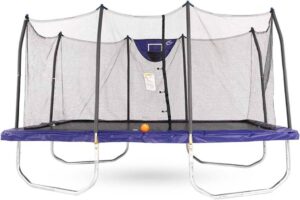
If your trampoline comes with an enclosure net, it’s time to install it. Follow the provided instructions to secure the net around the trampoline. This safety feature is crucial, especially if children will be using the trampoline. Make sure it’s properly attached and provides a secure environment for bouncing.
The enclosure net typically involves attaching vertical poles to the trampoline frame. Follow the manufacturer’s guidelines for pole placement and secure each pole tightly. Think of this step as laying the framework for a safety fortress, where every pole contributes to the strength and stability of the enclosure.
As you attach the net to the poles, pay attention to the secure fastening of each connection point. Ensure that the net is evenly distributed and free of any gaps or sagging. The mesh of the net acts as a protective shield, allowing visibility while creating a secure boundary for bouncers.
Many enclosure nets come with zipper or latch mechanisms to create a secure entry and exit point. Assess the functionality of these mechanisms by testing them for smooth and secure operation. This feature not only enhances safety but also encourages responsible usage of the trampoline.
With the enclosure net securely in place, your trampoline is now a haven of safe and carefree bouncing joy.
Finishing Touches: Double-Checking for Bouncing Brilliance
Now that all major components are in place, take a moment to double-check your work. Ensure all connections are tight, and there are no loose or missing parts. This final step is your assurance that your trampoline is not only assembled correctly but is also safe and ready for action.
Essential Safety Tips for Trampoline Enjoyment
As we continue our trampoline assembly guide, safety takes center stage. While the thrill of bouncing is undeniable, ensuring a secure environment is paramount for everyone’s well-being. Here, we’ll explore crucial safety tips to guarantee a fun and worry-free trampoline experience.
Importance of Following Safety Guidelines
Trampolines offer a fantastic outlet for physical activity and joy, but without proper precautions, injuries can occur. By following these safety tips, you not only protect yourself and others but also enhance the overall enjoyment of your trampoline.
Weight Limits, Supervision, and Proper Use
- Weight Limits: Every trampoline comes with a specified weight capacity. It’s crucial to respect and adhere to these limits. Overloading the trampoline can compromise its structural integrity and increase the risk of accidents.
- Supervision: Never underestimate the importance of supervision, especially when children are using the trampoline. An adult should always be present to oversee activities, ensuring that everyone follows safety guidelines.
- Proper Use: Emphasize the importance of using the trampoline for its intended purpose – bouncing. Discourage activities like somersaults or flips, which can lead to injuries. Educate users about the potential risks associated with misuse.
A Guide to Troubleshooting Common Trampoline Assembly Issues
It is a usual experience to face a few challenges during the trampoline assembly. Fear not! Here, we’ll address some common troubleshooting issues that may arise during or after the trampoline assembly process. Let’s tackle these challenges head-on and ensure your trampoline continues to provide a safe and enjoyable experience.
Common Assembly Issues and Solutions
-
Uneven Bounce:
Issue:If you notice uneven bouncing, it may be due to uneven tension in the springs.
Solution: Double-check the attachment of each spring, ensuring they are evenly distributed. Adjust the tension as needed to achieve a uniform bounce.
-
Frame Wobbling:
Issue: Frame instability can occur if not properly assembled.
Solution: Check the frame connections and make sure all bolts and nuts are tightened securely. If instability persists, confirm that the trampoline is on a level surface.
-
Difficulty Attaching Springs:
Issue: Some individuals may find it challenging to attach the springs due to their tension.
Solution: Use a spring tool or seek assistance from another person to make the process easier. Ensure that each spring is securely attached to prevent any potential hazards.
-
Loose or Missing Parts:
Issue: Discovering loose or missing parts during or after trampoline assembly.
Solution: Refer to the instruction manual and identify the missing or loose component. Tighten or replace the part as necessary. If a critical component is missing, contact the manufacturer for assistance.
-
Tears in the Jumping Mat or Enclosure Net:
Issue: Damage to the jumping mat or enclosure net may occur during assembly or use.
Solution: For small tears, use a patch kit to repair the damage. If the damage is extensive, contact the manufacturer for advice on replacement parts.
-
Squeaky Springs:
Issue: Springs may produce squeaky sounds during use.
Solution: Apply a silicone-based lubricant to the springs to reduce friction and eliminate squeaking.
Maintenance and Care
Congratulations on successfully assembling your trampoline! As you enjoy the joy of bouncing, it’s crucial to shift focus to the next chapter of our trampoline adventure – maintenance and care.
Proper upkeep not only extends the life of your trampoline but also ensures a consistently safe and enjoyable experience. Let’s dive into essential tips to keep your trampoline in top-notch condition.
1- Routine Inspections: The Key to Longevity
Regular inspections are the cornerstone of trampoline maintenance. Perform the following checks to catch and address issues before they escalate:
Frame and Springs: Examine for rust, wear, or damage. Tighten any loose bolts and ensure the springs are secure.
Jumping Mat: Check for tears, stretching, or signs of deterioration. Repair small tears promptly with a patch kit, and replace the mat if damage is extensive.
Enclosure Net: Inspect for tears or holes. Repair with a patch kit or replace damaged sections to maintain a secure bouncing zone.
2- Bolts and Nuts: Tighten for Stability
Frequent use may lead to loosening of bolts and nuts. Periodically check and tighten these components to maintain the stability and structural integrity of your trampoline.
3- Weather-Proofing: Shielding Against the Elements
If your trampoline resides outdoors, it’s exposed to the elements. Protect it from adverse weather conditions:
Weather Covers: Invest in a weather-resistant cover to shield your trampoline from rain, snow, and UV rays when not in use.
Anchor Kits: In windy areas, consider using anchor kits to secure the trampoline to the ground and prevent it from tipping over.
4- Cleaning Routine: Preserving Aesthetics and Functionality
A clean trampoline not only looks appealing but also functions optimally. Ensure your space remains clean with these helpful tips:
Regular Sweeping: Remove leaves, debris, and dirt from the jumping mat using a soft broom or brush.
Wet Cloth for Frame: Wipe down the frame with a damp cloth to remove any accumulated dust or dirt.
No Harsh Chemicals: Avoid using harsh chemicals or abrasive cleaners, as they can damage the jumping mat and frame.
5- Storing for the Winter: A Seasonal Retreat
If you experience harsh winters or extended periods of non-use, consider the following steps:
Disassembly: If possible, disassemble the trampoline and store it indoors during the winter months.
Weather Covers: If trampoline disassembly isn’t feasible, ensure the trampoline is covered with a weather-resistant cover to protect it from the elements.
By incorporating these maintenance and care practices into your trampoline routine, you’re not only preserving its longevity but also guaranteeing a consistently safe and delightful bouncing experience.
Conclusion
As we finish our trampoline assembly guide, we thank you for embarking on this journey to elevate your outdoor fun.
By now, your trampoline stands tall, ready to deliver moments of joy, laughter, and gravity-defying excitement. Through careful assembly, adherence to safety guidelines, troubleshooting challenges, and ongoing maintenance, you’ve not only built a trampoline but also a portal to boundless family memories and fitness adventures.
As you watch loved ones bounce with fun, or perhaps join in the fun yourself, take pride in the fact that your dedication to proper assembly and maintenance has created a safe and enjoyable space. May your trampoline continue to be a source of happiness and play for years to come. Happy bouncing!
Share Your Thoughts
Dear Readers, as we finish our comprehensive trampoline assembly guide, we’re happy by the prospect of your newfound bouncing success. Now, it’s time for you to take center stage! Our call-to-action is an invitation for you to share your experiences, ask questions, and become part of the ever-growing bounce.
Share Your Success Stories:
We want to hear about your trampoline assembly victories! Share your stories, photos, and videos of the first exhilarating bounces on your freshly assembled trampoline. Your success might inspire others embarking on the same journey.
Engage in the Bouncing Conversation:
Have questions or insights to share? Engage in the bouncing conversation in the comments section. Whether you’re a seasoned trampoline enthusiast or a first-time assembler, your input is valuable. Let’s build a community where tips and experiences are exchanged freely.
Seek Assistance and Provide Support:
Encountered a unique challenge during assembly or facing a specific maintenance dilemma? Don’t hesitate to seek assistance. Likewise, if you’ve overcome challenges, share your solutions to support fellow bouncers in their trampoline adventures.
Connect on social media:
Join us on social media platforms to extend the conversation beyond the blog. Share your trampoline moments, connect with like-minded enthusiasts, and stay updated on the latest bouncing trends.
Stay Tuned for More:
Our commitment to your bouncing success doesn’t end here. Stay tuned for additional resources, tips, and exciting trampoline-related content.
Your journey with your trampoline is just beginning, and we’re here to support you every bounce of the way. Join the bounce brigade, and let’s make trampolining a shared adventure filled with laughter, stories, and endless fun. Together, we’ll elevate the joy of bouncing to new heights! Happy bouncing!
Related posts:
- Trampoline Safety Tips – Jumping for Joy without the Risk
- Trampoline Disassembly Guide: Unlocking the Secrets to Safe Dismantling
- Trampoline Hole Repair Guide: Masterful Fixes for Unleashing Bouncing Power!
- Trampoline Ground Preparation: Mastering the Art of Bouncing Success
- Trampoline Cleaning Power Guide: Optimizing Safety and Longevity
