Introduction
Welcome to the exciting world of jumping on trampolines! This guide is all about making sure your trampoline experience is super fun and safe. We’re going to talk about something really important that not everyone thinks about – the trampoline ground preparation.
It’s like the stage for your jumping show! Imagine a sunny day, lots of laughter, and you bouncing high on your trampoline. To make sure that happens safely, we need to prepare the ground properly.
It’s crucial to pay attention to the trampoline ground preparation. Whether you’re a seasoned trampoline enthusiast looking to enhance your setup or someone new to the world of bouncing excitement, our journey will discover the essentials of trampoline ground preparation. Safety, stability, and enjoyment are at the core of this exploration.
So, let’s embark on this adventure together, uncovering the foundations of trampoline success that will elevate your bouncing experience to new heights.
Why Trampoline Ground Preparation Matters
Trampolining is more than just a fun physical activity; it’s an experience that can be truly elevated by paying attention to the often-underestimated aspect of trampoline ground preparation. Here, we’ll highlight key points to emphasize why investing time and effort into ground preparation for your trampoline is a crucial step in ensuring both safety and enjoyment.
- Safety First: The paramount reason for trampoline ground preparation is safety. A level and clear surface reduce the risk of accidents, ensuring that every jump is a joyous one. The right groundwork can minimize the chances of injuries and create a secure environment for trampoline users of all ages
- Stability for Optimal Performance: A well-prepared ground doesn’t just contribute to safety – it also enhances the overall performance of your trampoline. A stable surface provides a consistent bounce, allowing users to execute tricks and flips with confidence.
- Longevity of Equipment: Your trampoline is an investment, and proper trampoline ground preparation is a key factor in ensuring its longevity. An adequately prepared surface can prevent unnecessary wear and tear on the trampoline frame and components, ultimately extending its lifespan.
- Optimal Aesthetics: Beyond the functional aspects, a thoughtfully prepared trampoline area can add aesthetic value to your backyard. Considering factors like location, ground cover, and protective barriers can contribute to a visually pleasing and well-integrated trampoline space.
- Full Enjoyment for All Ages: Trampoline ground preparation matters because it opens the door to enjoyment for users of all ages. A properly prepared trampoline space invites everyone to join in the bouncing fun, creating a shared experience for friends and family.
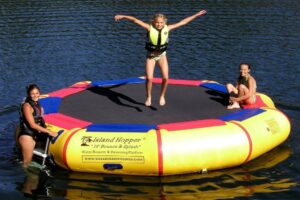
Selecting the Ideal Location
Choosing the perfect spot for your trampoline is a pivotal step in creating a safe and enjoyable bouncing experience. Here, we’ll delve into the key factors to consider when selecting the ideal location for your trampoline, ensuring that every jump is a leap into pure joy.
- Level Ground: Begin by finding a flat and level area for your trampoline. Avoid sloping terrain, as this can affect the stability of the trampoline and compromise safety.
- Distance from Obstacles: Look around the potential trampoline location and ensure there’s enough clearance from obstacles like trees, fences, or structures. Ensure a suitable distance to maintain for a safe bouncing zone and how it contributes to an accident-free experience.
- Sun Exposure: Consider the exposure to sunlight when situating your trampoline. While a sunny spot can enhance the overall experience.
- Proximity to Utilities: Be mindful of utility lines and underground utilities when choosing a location. Safety is paramount.
- Accessibility: Consider the simplicity of reaching the trampoline. It is importance of convenient access for users of all ages and abilities, making it a hassle-free experience for everyone in the family.
Selecting the ideal location for your trampoline sets the stage for a secure and enjoyable bouncing environment. Whether you have a spacious backyard or a more compact space, the right location enhances safety, stability, and overall satisfaction.
Clearing the Ground
Before you take that first exciting bounce, it’s crucial to ensure that the ground around your trampoline is clear and safe. Here, we’ll explore the essential steps involved in clearing the ground, creating a secure environment for your bouncing excitement.
- Removing Debris
Begin by clearing the area of any debris, such as sticks, rocks, or leaves. These objects not only pose a tripping hazard but can also damage the trampoline. It is important to have clean surface for both safety and trampoline longevity.
- Trimming Overhanging Branches
Check for any overhanging branches or foliage that could interfere with your trampoline. Trimming these back is not only about creating space but also prevents potential damage to the trampoline during windy conditions. It is important trimming branches to ensure a clear airspace above.
- Creating a Safe Zone
Establish a designated safe zone around the trampoline. This is an area free of furniture, toys, or any other potential obstacles. This ideal safe zone contributes to a secure bouncing environment.
- Regular Maintenance Checks
Implement a routine for regular maintenance checks. This process of inspecting the ground around the trampoline, ensuring that it remains clear and safe for every jumping session.
- Securing Loose Items
Secure any loose items in the nearby that could be affected by the trampoline’s motion. This includes patio furniture, garden tools, or any other objects that might be impacted during bouncy sessions. It is important to anchor or securing loose items to prevent accidents.
Clearing the ground around your trampoline is a fundamental step in creating a secure and enjoyable space for your bouncing adventures. Whether you’re setting up a trampoline in a backyard oasis or a more confined space, a clutter-free environment contributes to both safety and the longevity of your trampoline.
Leveling the Ground
 When it comes to creating a safe and enjoyable trampoline experience, one of the foundational steps is leveling the ground. Here, we’ll delve into the significance of a flat and even surface, guiding you through the process to ensure your trampoline is ready for stability and fun.
- The Importance of Level Ground
Why does level ground matter? A flat surface is the key to maintaining the stability of your trampoline. We’ll explore how uneven ground can impact the performance of your trampoline and form safety risks, emphasizing the critical role of a leveled foundation.
- Tools Needed for Leveling
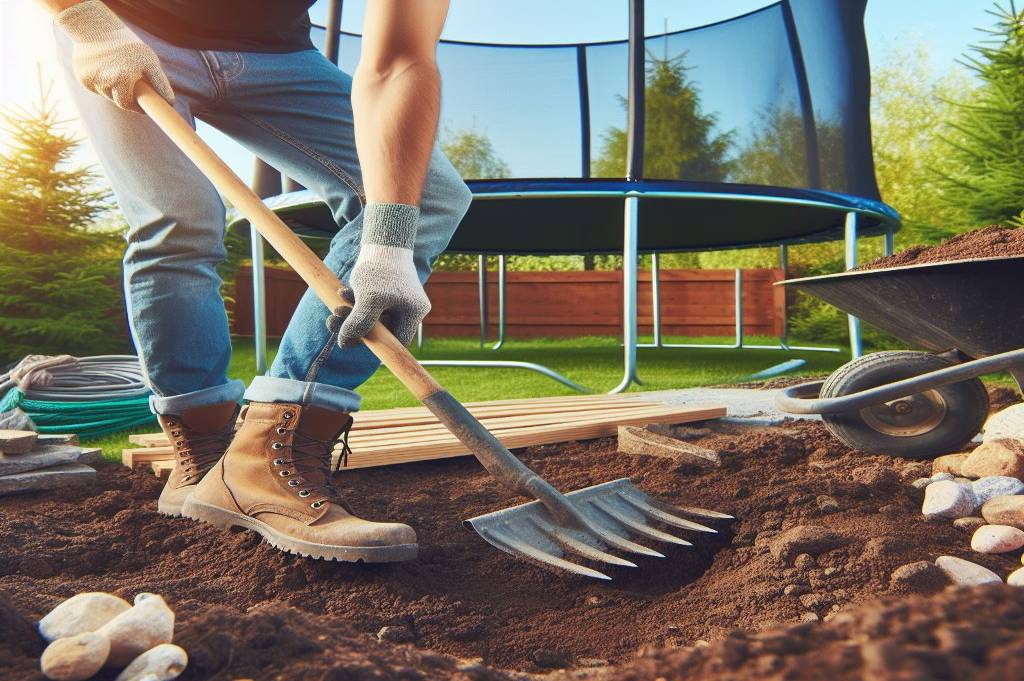
When it comes to leveling the ground for your trampoline, you won’t need a vast array of specialized equipment. Instead, basic tools can do the trick. A sturdy rake, a reliable shovel, and a tape measure are the primary players in this leveling game.
The rake helps smooth out uneven surfaces, the shovel aids in digging or filling areas as needed, and the tape measure ensures precision in assessing the levelness of the ground.
These simple yet effective tools, combined with a bit of patience and attention to detail, empower you to create an optimal trampoline foundation without the need for complex or specialized equipment.
Step-by-Step Leveling Process
Ensuring your trampoline is set up on a level surface is a crucial step that can make all the difference in safety and enjoyment.
1- Measure the Ground:
Begin by measuring the area where you plan to set up your trampoline. Use a tape measure to assess the length and width, ensuring you have accurate dimensions to work with.
2- Identify High and Low Points:
Once measured, identify any high or low points in the designated trampoline area. This step is crucial for understanding where adjustments are needed to achieve a level surface.
3- Remove Excess Soil or Add Fill Material:
If you find high points, use a shovel to remove excess soil. For low points, add fill material such as soil or sand. The goal is to create a consistent ground level throughout the trampoline area.
4- Compact the Ground:
After adjusting, use a tamper or the back of a shovel to compact the ground. This helps ensure stability and reduces the risk of settling over time.
5- Check for Levelness:
Utilize a level tool to check for evenness. Place the level in different directions to confirm that the ground is perfectly level. Make any final adjustments as needed.
6- Consider Using a Leveling Kit:
For added precision, consider using a trampoline leveling kit. These kits often include tools like a bubble level and shims, offering a more straightforward approach to achieving a perfectly level trampoline surface.
7- Reassess Regularly:
Keep in mind that ground conditions can change over time. Regularly reassess the levelness of the trampoline area and adjust if necessary to maintain a stable foundation.
By following this step-by-step leveling process, you’re not just creating a flat surface for your trampoline – you’re building the foundation for a safe and enjoyable bouncing experience.
Dealing with Sloped Terrain
Dealing with sloped terrain requires a thoughtful approach, and with these strategies, you can turn challenging landscapes into an ideal trampoline setting. Whether your yard has a gentle slope or a more pronounced incline, these techniques will guide you in creating a leveled foundation for endless bouncing enjoyment.
1- Evaluate the Slope:
Before making any adjustments, assess the degree of slope in your yard. Determine the direction and intensity of the incline to understand how it might impact the trampoline’s stability.
2- Use Retaining Walls:
Consider installing retaining walls on the down slope side of the trampoline. These walls help create a level surface and prevent soil erosion, providing stability for your trampoline.
3- Build a Platform:
Constructing a platform is another effective way to level a trampoline on sloped terrain. This involves building a flat surface using materials like treated lumber or concrete blocks. The trampoline is then placed on this leveled platform.
4- Dig Into the Slope:
In some cases, you may need to dig into the slope to create a level area for your trampoline. Use a shovel to excavate the high side of the slope, redistributing the soil to fill in the low side.
5- Consider Adjustable Legs:
Some trampoline models come with adjustable legs, allowing you to customize the height on each leg to accommodate sloped terrain. Explore this option for added flexibility in setting up your trampoline.
6- Consult Professional Help:
If the slope is significant or if you’re unsure about the best approach, consider consulting with landscaping professionals. They can provide expert advice on how to level the ground effectively and create a safe trampoline setup.
7- Regular Monitoring:
Keep a watchful eye on the trampoline’s stability over time, especially after rain or significant weather events. Regular monitoring allows you to adjust as needed, maintaining a secure foundation.
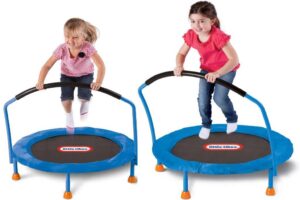
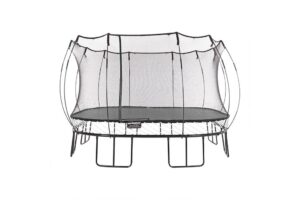
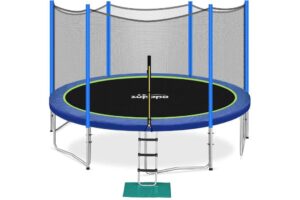
Installing a Protective Barrier
One key for creating a safe zone for your trampoline is the installation of a protective barrier. Here, we’ll explore the importance of this safety feature and provide insights into the various types of barriers available, ensuring your trampoline area is secure and ready for endless bouncing fun.
A protective barrier serves as a crucial safety feature, preventing users from accidentally falling off the trampoline during energetic bounces. It adds an extra layer of security, especially for younger users or those still getting accustomed to the bouncing experience.
Types of Protective Barriers
There are several options when it comes to protective barriers. We will help you to choose the one that best suits your needs.
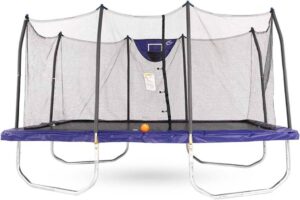
1- Net Enclosures:
Net enclosures are a popular and effective choice for trampoline safety. These transparent nets surround the entire trampoline, forming a barrier that prevents users from accidentally bouncing off.
2- Skirts and Padding:
Skirts and padding add an extra layer of protection by covering the frame and springs of the trampoline. Not only do they contribute to safety, but they also enhance the overall aesthetic appeal of your bouncing area.
3- Combination Setups:
Some trampoline designs incorporate a combination of net enclosures, skirts, and padding to provide comprehensive protection.
4- Built-in Features:
Some protective barriers come with built-in features such as pockets or organizers. These additions can be both practical and fun, providing convenient storage for shoes or toys and adding an extra element of enjoyment to your trampoline area.
Ground Cover Types
During the trampoline ground preparation process, the choice of ground cover is a crucial decision that not only enhances safety but also contributes to the overall aesthetics of your bouncing space. Here, we’ll explore various ground cover options, guiding you to create a trampoline area that is both secure and visually appealing.
1- Grass Protection Mats
Grass protection mats offer a natural and unobtrusive solution for trampoline ground cover. These mats create a barrier between the trampoline legs and the grass, preventing wear and tear.
2- Rubber Mats or Tiles
Rubber mats or tiles provide a flexible and durable ground cover option. These shock-absorbent materials create a protective layer beneath the trampoline, minimizing impact on the ground and ensuring a softer landing for jumpers.
3- Trampoline Skirts
Trampoline skirts not only add a decorative touch but also serve as a practical ground cover option. These fabric skirts encircle the base of the trampoline, providing a neat and tidy appearance while preventing debris from accumulating beneath the trampoline.
4- Artificial Turf
For a good and maintenance-free option, artificial turf can be an excellent ground cover choice. It’s even surface creates a clean and appealing look while eliminating concerns about grass maintenance.
5- Mulch or Wood Chips
Mulch or wood chips offer a natural and cost-effective ground cover option. These materials create a soft surface, reducing the impact on the ground and providing a cushioned landing for jumpers.
Whether you prioritize a natural look, durability, or a combination of both, the ground cover options for your trampoline are diverse and cater to various preferences, that aligns with both safety requirements and the visual aesthetics you envision for your trampoline space.
Anchoring Your Trampoline
Anchoring your trampoline is a proactive step towards creating a safe and stable environment for bouncing excitement. Whether you’re setting up a trampoline for your family or in a public space, the assurance of a securely anchored trampoline enhances both safety and peace of mind.
Here, we’ll delve into the significance of anchoring your trampoline, exploring the various methods available to ensure a secure and stable bouncing experience.
Understanding the Need for Anchoring
Trampolines, by nature, involve dynamic movements, and anchoring becomes crucial to prevent unexpected shifts or overturning during use.
An unanchored trampoline poses a significant risk of accidents and injuries, also the trampoline is an investment in outdoor fun, and proper anchoring plays a role in safeguarding that investment.
Without secure anchoring, the trampoline may experience unnecessary wear and tear.
Different environmental conditions, from windy days to uneven terrain, can impact the stability of your trampoline. Anchoring is the solution to ensure that your trampoline remains steadfast, providing a reliable and secure platform for bouncing under various circumstances.
Types of Trampoline Anchors
Here, we’ll go through diverse world of trampoline anchors, unraveling the unique features and applications of different types.
1- Spiral Anchors
Spiral anchors, also known as corkscrew anchors, are a popular choice for trampoline stability. These anchors are twisted into the ground, providing a strong hold.
2- Auger-Style Anchors
Auger-style anchors feature a corkscrew design like spiral anchors but often have a larger surface area. This design is effective in providing stability on various soil types, including both soft and hard ground.
3- In-Ground Anchors
In-ground anchors involve burying the anchor in the ground, creating a low-profile and seamless appearance. These anchors are suitable for users who prefer a cleaner aesthetic around their trampoline.
4- Weighted Sandbags
Weighted sandbags offer a flexible alternative for anchoring trampolines, especially in areas where traditional anchors may not be suitable. These sandbags are placed on the trampoline legs, providing stability without the need for twisting into the ground.
5- Strap Systems
Strap systems involve securing the trampoline to the ground using straps attached to anchor points. This method provides a customizable approach to anchoring, allowing users to adjust the tension of the straps.
6- Combination Systems
Some trampoline setups may benefit from a combination of anchor types. This could involve using both spiral anchors and weighted sandbags, for example.
Regular Maintenance Tips
Your trampoline is not just a piece of equipment; it’s a gateway to endless joy and exhilarating adventures. To keep the good times rolling and ensure a safe bouncing experience, regular maintenance is key.
Start your maintenance routine by inspecting the frame and springs. Look for any signs of wear, rust, or damage. If you spot any issues, address them promptly to maintain the structural integrity of your trampoline.
The jumping mat is where all the action happens. Regularly examine it for tears, fraying, or stretched areas. A well-maintained mat ensures a smooth and safe bouncing experience. Replace the mat if you notice significant damage.
If your trampoline is equipped with protective barriers or net enclosures, check them for tears, holes, or loose attachments. These barriers are crucial for user safety, so any issues should be addressed promptly.
If you’ve used anchors to secure your trampoline to the ground, make sure they are still firmly in place. This is especially important after severe weather conditions, as anchors can shift. Re-anchor if necessary to maintain stability.
If you’ve chosen a ground cover, whether it’s grass protection mats, rubber tiles, or other materials, assess their condition. Replace or repair any damaged sections to provide a stable and safe surface around the trampoline.
Over time, bolts and nuts may become loose due to the constant bouncing. Periodically check and tighten all connections to prevent any wobbling or instability in the trampoline frame.
If your trampoline has a ladder for easy access, inspect it for stability. Tighten any screws or bolts and ensure the ladder is securely attached to the frame.
If you have accessories like padding or skirts, store them properly when not in use. This protects them from the elements and ensures they remain effective when installed on the trampoline.
Conclusion
As we finish our talk about “Trampoline Ground Preparation: Mastering the Art of Bouncing Success”. Let’s look back at the journey. You’ve done some cool stuff to make sure your trampoline is not just safe but also super fun. Let’s keep it simple and celebrate the steps you took for awesome bouncing moments.
First, you picked the perfect spot and made sure the ground was nice and flat. Your trampoline now sits on solid ground, ready for some serious bouncing.
Next, you added things like nets and skirts to keep everyone safe and make the trampoline area look cool. It’s not just about safety; it’s about making your bouncing spot a stylish hangout.
Then came the part about anchoring – making sure your trampoline doesn’t move around. You learned about different ways to do this, like twisting anchors into the ground or using sandbags.
Then check your trampoline regularly to keep everything in good shape. Taking care of it means more fun and less worrying about stuff going wrong.
Lastly, you made your trampoline setup yours. Picking the ground cover you like, choosing the barriers that suit you – it’s all about making your bouncing spot exactly how you want it.
Now, when you look at your trampoline in the backyard, it’s not just a bunch of things put together. It’s a place where you’re going to have loads of fun – jumping, laughing, and making memories. You did a great job making sure your trampoline is not just a toy; it’s a stage for awesome adventures.