Introduction
Trampolines are a source of endless joy and entertainment for families, providing hours of bouncing fun. However, there comes a time when you may need to bid farewell to your beloved trampoline, whether it’s due to a move, the changing seasons, or the need for maintenance. The process of trampoline disassembly might seem like a daunting task, but fear not – with the right knowledge and precautions, you can navigate it smoothly.
In this comprehensive guide, we will walk you through the steps of disassembling your trampoline safely. We’ll cover everything from gathering the necessary tools to the final steps of cleaning and storage. But before we dive into the nitty-gritty details, let’s take a moment to understand why knowing how to disassemble your trampoline is essential.
Trampolines are not just large pieces of equipment; they are investments in family fun and well-being. Whether you’ve decided to relocate, need to store it away for the winter, or are simply performing routine maintenance, the ability to disassemble your trampoline is a valuable skill that ensures the longevity of your equipment.
One of the key elements in this process is safety. Trampolines, by their nature, involve bouncing, and disassembling one requires careful attention to prevent accidents or damage. Throughout this guide, we will underscore the importance of safety measures, encouraging you to prioritize your well-being and that of anyone assisting you in the trampoline disassembly process.
Before we embark on this journey together, remember that each trampoline is unique, and the trampoline disassembly process may vary based on its make and model. Therefore, it’s crucial to have your trampoline’s user manual on hand. This guide will serve as a companion to the manual, offering additional insights, tips, and a structured approach to ensure a seamless trampoline disassembly experience.
Now, let’s get ready to unlock the secrets of trampoline disassembly and pave the way for a smooth transition from assembled fun to safely packed storage. Safety first, and let’s make the process of trampoline disassembly an easy and enjoyable task.
Gather Necessary Tools and Equipment
Embarking on the journey of trampoline disassembly requires more than just enthusiasm; it calls for a set of essential tools and equipment to ensure a smooth and efficient process. Here, we’ll delve into the first crucial step: gathering the necessary tools and equipment.
List of Required Tools
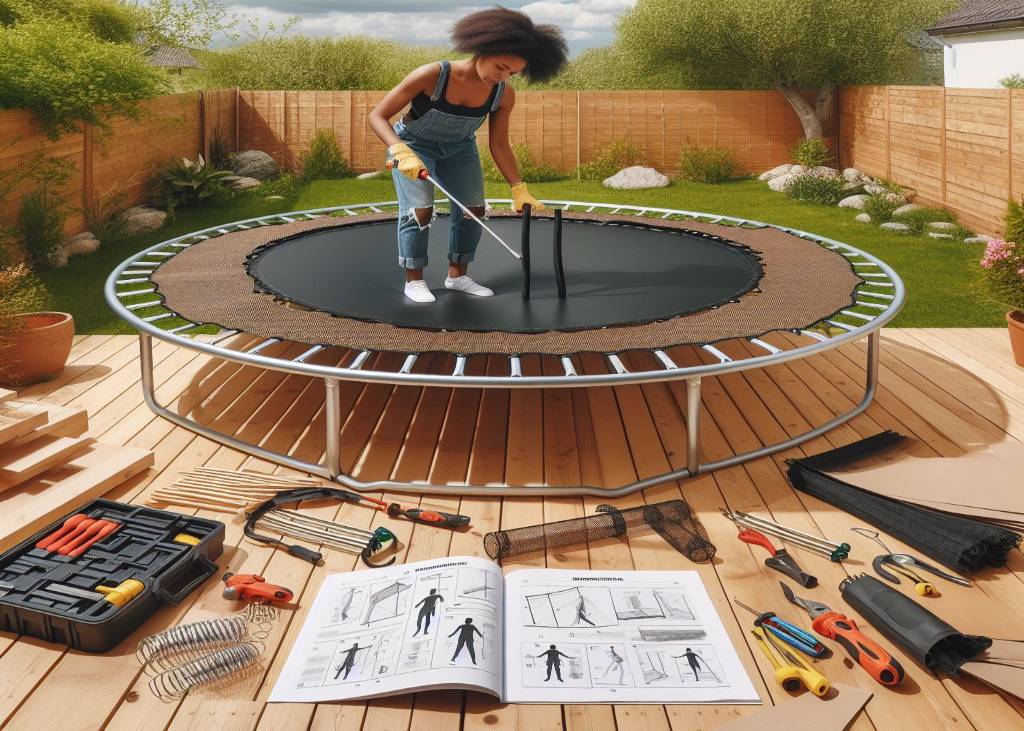
Before you start the trampoline disassembly process, take inventory of the following tools:
- Wrench and Screwdriver Set:
A versatile set of wrenches and screwdrivers will help you tackle various nuts, bolts, and screws that hold the trampoline components together.
- Spring Pulling Tool:
Especially important for trampolines with tightly wound springs, this tool makes the removal process safer and more efficient.
- Pliers:
Handy for gripping and manoeuvring small components, pliers are essential for a controlled trampoline disassembly.
- Rubber Mallet:
Use a rubber mallet to gently tap or nudge components that might be stuck due to wear or weathering.
- Ladder:
If your trampoline is equipped with an enclosure net, a ladder will aid in reaching and safely removing it.
- Safety Gear:
Prioritize your well-being by wearing gloves to protect your hands, safety glasses to shield your eyes, and closed-toe shoes for added foot protection.
Safety Gear Recommendations:
Here are some Safety Gear Recommendations before beginning:
- Gloves:
Choose durable gloves that provide a good grip and protect your hands from sharp edges and potential pinch points.
- Safety Glasses:
Shield your eyes from debris and any small components that may spring loose during the trampoline disassembly process.
- Closed-Toe Shoes:
Ensure your feet are adequately protected with closed-toe shoes to prevent injuries from falling tools or components.
Importance of Having the User Manual
Before you dive into the trampoline disassembly process, locate and review your trampoline’s user manual. The manual will offer specific guidance on the tools required and provide insights into the assembly and disassembly procedures. Having it on hand ensures that you are following manufacturer-recommended guidelines and helps prevent errors that may arise from guesswork.
Prepare the Work Area for Trampoline Disassembly
Before diving into the trampoline disassembly process, it’s crucial to create a well-organized and safe work area. This step not only ensures an efficient dismantling but also minimizes the risk of accidents.
Choose the Right Spot:
Select a flat and spacious area for the trampoline disassembly. A clean and level surface will provide stability and make it easier to handle trampoline components. Ensure there’s enough room for the disassembled parts without overcrowding the space.
Clear Obstacles:
Remove any potential obstacles or hazards around the trampoline. This includes toys, furniture, or any other items that might get in the way during the trampoline disassembly process. A clear space not only facilitates the work but also reduces the chances of accidents.
Check the Weather:
If you’re working outdoors, keep an eye on the weather forecast. Avoid disassembling the trampoline during adverse weather conditions like rain or strong winds. Working in favourable weather conditions not only ensures your safety but also prevents potential damage to trampoline components.
Follow a Systematic Approach:
Plan the order in which you’ll disassemble the trampoline components. Following the user manual, start with the enclosure net, move on to the frame, and then the springs and mat. A systematic approach makes the process of trampoline disassembly more organized and reduces the likelihood of errors.
Prioritizing Safety
Taking the right precautions not only ensures your well-being but also contributes to a smooth and incident-free trampoline disassembly process. Here, we’ll delve into the importance of prioritizing safety and provide essential guidelines to keep you secure during the trampoline disassembly.
Wear Appropriate Safety Gear:
Before you start dismantling your trampoline, equip yourself with the right safety gear:
- Gloves: Protect your hands from potential cuts or abrasions.
- Safety Glasses: Shield your eyes from debris or any small components that may fly off during the trampoline disassembly.
- Closed-Toe Shoes: Ensure your feet are covered to avoid injuries from falling tools or components.
Secure Loose Clothing:
Avoid wearing loose clothing or accessories that could get caught in the trampoline’s components. Tying back long hair and removing jewelry reduces the risk of entanglement and ensures a safer working environment.
Stay Aware of Surroundings:
Constantly be aware of your surroundings. Check for potential hazards, like tools left on the ground or uneven surfaces. A vigilant approach contributes to a safer work environment.
Follow Manufacturer Guidelines:
Refer to the user manual for specific safety guidelines provided by the trampoline manufacturer. These guidelines are tailored to your trampoline model and offer crucial insights into safe trampoline disassembly practices.
Start with the Enclosure Net
As you gear up for the trampoline disassembly, the enclosure net is often the first component to tackle. Whether you’re moving your trampoline, storing it for the season, or performing maintenance, removing the enclosure net is a crucial initial step.
Locate Attachment Points:
Refer to your trampoline’s user manual to identify the specific attachment points of the enclosure net. These are usually secured to the frame with straps or clips. Take a moment to familiarize yourself with the configuration before proceeding.
Release the Net from Attachment Points:
Follow these steps to safely release the enclosure net:
- Starting from one side, carefully unclip or loosen the straps securing the net to the frame.
- If your trampoline has zipper closures, unzip them to detach the net from the frame.
Remove Poles and Supports:
If your enclosure net is supported by poles, these need to be removed next:
- Detach the poles from their brackets or holders.
- Gently lay the poles down in a safe area to avoid tripping hazards.
Fold and Store the Net:
Fold the enclosure net neatly, making it easier to handle and store. If your net has specific folding instructions in the user manual, be sure to follow them for optimal storage.
Securely Store the Net:
If you plan to store the net for an extended period, ensure it is stored in a cool, dry place. Avoid exposure to direct sunlight, as prolonged sun exposure can cause deterioration.
Disassemble the Frame
Now that the enclosure net has been neatly packed away, the next phase in your trampoline disassembly journey involves taking apart the frame. The frame is the backbone of your trampoline, and dismantling it requires a systematic approach to ensure both efficiency and safety.
Here, we’ll walk you through the steps of disassembling the trampoline frame, bringing you one step closer to a fully dismantled setup.
Identify Frame Sections:
Trampoline frames are typically divided into sections for easier disassembly. Identify these sections and understand how they interconnect. Often, frames use bolts, screws, or other fasteners to secure the pieces together.
Begin Unfastening Components:
Follow these steps to start the disassembly process:
- Use the appropriate tools (wrench, screwdriver, etc.) to unfasten the bolts or screws securing the frame sections.
- Maintain order by following a systematic approach and giving undivided attention to each section.
Detach Frame Sections:
Once the fasteners are removed, carefully detach each frame section. Depending on your trampoline model, you may encounter different types of connectors. Pay attention to these details to avoid any mishaps during the disassembly.
Prepare for Storage:
If you’re planning to store the frame, ensure it is clean and dry. Consider covering it with a tarp or using a storage solution recommended in the user manual to prevent damage during storage.
Take Down the Springs and Mat
The spotlight now shifts to the trampoline’s heart – the springs and mat. Disassembling this integral part of your trampoline requires precision and care to ensure a smooth process. Here, we’ll walk you through the steps of taking down the springs and mat, bringing you closer to completing the disassembly puzzle.
Identify Attachment Points:
Locate the attachment points where the springs connect to the frame and mat. Understanding how these elements are interconnected will guide you through a more efficient disassembly.
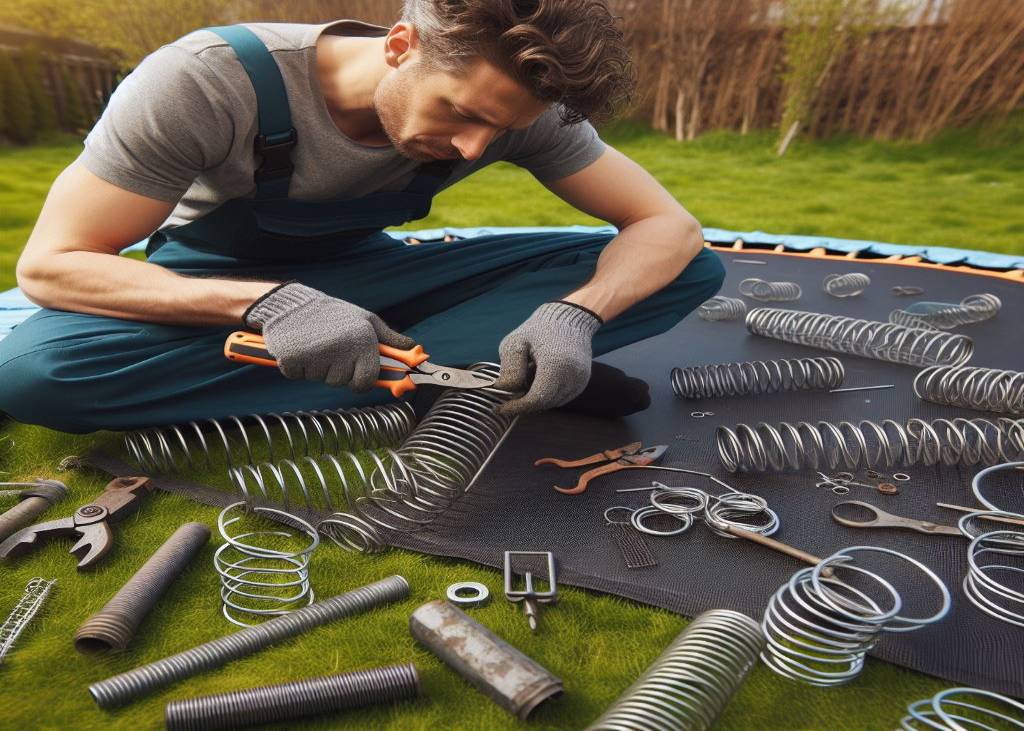
Use a Spring Pulling Tool:
If your trampoline has tightly wound springs, consider using a spring pulling tool. This specialized tool makes the removal process easier and minimizes the risk of accidents. Insert the tool into the coil of the spring and carefully pull it away from the frame.
Release Springs from Frame:
Working systematically, release the springs from the frame. Use the appropriate tools, such as pliers or a wrench, to unfasten any bolts or screws securing the springs to the frame. Remove each spring one at a time, keeping them organized for easier reassembly.
Detach Springs from Mat:
Once the springs are disconnected from the frame, turn your attention to the mat. Carefully detach the springs from the mat, taking note of their original placement. This step requires patience and attention to detail.
Remove the Mat:
With the springs detached, you can now remove the mat from the frame. Fold it neatly for storage or follow any specific instructions provided in the user manual for mat removal.
Prepare for Storage:
If you plan to store the springs and mat, ensure they are clean and dry. Consider using a storage solution recommended in the user manual to prevent damage during storage.
Check for Wear and Tear
As you progress through the trampoline disassembly, taking a moment to inspect for wear and tear is a crucial step. Regular wear, exposure to the elements, and the impact of bouncing can all contribute to the deterioration of trampoline components.
Here, we’ll guide you through the process of checking for wear and tear, helping you identify potential issues early on and ensuring a longer life for your trampoline.
Systematic Inspection:
Start by conducting a systematic inspection of each component you’ve disassembled. This includes the frame, springs, mat, and any other parts. Spot these distinct cues of wearing down and deterioration:
- Rust: Check metal components for rust, especially in areas exposed to the elements. Rust can compromise the structural integrity of the trampoline.
- Frays or Tears: Inspect the mat and enclosure net for any frays, tears, or weakened areas. These can compromise the safety of the trampoline.
- Bent or Damaged Springs: Examine each spring for bends or damage. Damaged springs can affect the trampoline’s bounce and pose a safety risk.
Addressing Wear and Tear:
Once you’ve identified any signs of wear and tear, take the necessary steps to address them:
- Rust Removal: Use a wire brush or sandpaper to remove surface rust from metal components. To prevent future corrosion, it is worth considering the application of a coating that resists rust.
- Patch or Replace Mat: If the mat has frays or tears, consider patching smaller areas with a repair kit. For more extensive damage, it might be necessary to replace the mat.
- Replace Damaged Springs: Bent or damaged springs should be replaced. Most trampoline manufacturers offer replacement springs that match the specifications of your model.
Cleaning and Storing Your Disassembled Trampoline
As you wrap up the trampoline disassembly, the final act involves cleaning and storing each component with care. Properly maintaining these pieces ensures their longevity and primes you for a hassle-free reassembly when the time comes. Here, we’ll delve into the art of cleaning and storing your disassembled trampoline.
Cleaning Components:
Before storing your trampoline, each component deserves a bit of attention. Follow these steps to ensure they’re in top-notch condition:
- Frame: Wipe down the frame with a clean, damp cloth to remove any accumulated dirt, debris, or rust. If rust is present, use a wire brush or sandpaper to gently scrub it away.
- Mat: Clean the mat using a mild detergent and water. Scrub away any stains or dirt, and allow the mat to dry completely before storage.
- Springs: Wipe down each spring to remove dirt and prevent corrosion. A dry, clean cloth works well for this task.
- Enclosure Net: If you’ve removed an enclosure net, inspect it for any dirt or debris. Clean it using a gentle detergent and water, and make sure it’s completely dry before storing.
Disassemble and Organize:
If your trampoline is not staying assembled during storage, consider disassembling it further for efficient storage. Organize components in a way that minimizes the risk of damage and makes reassembly straightforward. Small items like nuts, bolts, and screws can be stored in secure bags or containers.
Choose an Ideal Storage Space:
Selecting the right storage space is crucial for maintaining your trampoline’s condition. Consider the following:
- Climate Control: If possible, store your trampoline components in a climate-controlled space to avoid extreme temperature fluctuations that could lead to damage.
- Protection from Moisture: Ensure that the storage area is dry, as moisture can contribute to rust and other damage. Consider using moisture-absorbing products in the storage space.
Protective Covers:
For larger components like the mat and enclosure net, consider using protective covers. These covers shield against dust, potential scratches, and general wear, ensuring that your trampoline components stay in optimal condition during storage.
Periodic Checkups:
While your trampoline is in storage, periodically check on it to ensure that everything remains in good condition. This prevents any surprises when it’s time for reassembly.
Troubleshooting and Common Issues
As you navigate the trampoline disassembly, encountering challenges is par for the course. Whether it’s stubborn components, unexpected issues, or simply a lack of clarity, troubleshooting is an essential skill.
Here, we’ll explore common issues you might face during trampoline disassembly and provide solutions to keep the process on track.
Stuck or Rusty Fasteners:
Issue: Bolts, screws, or nuts refusing to budge due to rust or general wear.
Solution:
- Apply penetrating oil to rusted fasteners and allow it to sit for some time.
- Use the appropriate tools, like a wrench or screwdriver, and apply steady pressure to loosen the fasteners.
- If a fastener remains stubborn, consider tapping it gently with a rubber mallet to break the rust.
Tight Springs:
Issue: Springs are tightly wound and challenging to detach.
Solution:
- Utilize a spring pulling tool to ease the removal process.
- Work systematically, releasing one spring at a time to avoid excessive tension.
Frame Components Won’t Separate:
Issue: Frame sections seem stuck together.
Solution:
- Inspect for hidden fasteners or connectors that may have been overlooked.
- Use a rubber mallet to gently tap along the joints, helping to separate sections.
Tangled or Difficult Net Removal:
Issue: Enclosure net removal is complicated due to tangles or snags.
Solution:
- Work patiently, untangling knots or snags carefully to avoid damaging the net.
- If applicable, unzip any zipper closures before attempting to remove the net.
Uneven Frame Sections:
Issue: Frame sections don’t align properly.
Solution:
- Ensure that frame sections are correctly oriented and that connectors match.
- Adjust sections as needed before securing them with fasteners.
Damaged Components:
Issue: Discovering damaged parts during disassembly.
Solution:
- Examine the scale of the destruction and explore repair choices.
- If significant, contact the manufacturer for replacement parts.
Conclusion
Congratulations on successfully completing the trampoline disassembly! This comprehensive guide has walked you through essential steps, emphasizing safety, a systematic approach, and troubleshooting common issues. As you wrap up this journey, the significance of a clean and organized storage space is highlighted, ensuring the well-preserved condition of your trampoline components.
Looking forward, this accurate trampoline disassembly process sets the stage for a smooth reassembly, promising future moments of joyous bouncing.
Thank you for joining us on this trampoline disassembly adventure, and if you have any questions or need further assistance, feel free to reach out. Happy bouncing!
Related posts:
- Trampoline Maintenance Essentials: Energize Your Jumping Fun
- Trampoline Cleaning Power Guide: Optimizing Safety and Longevity
- Trampoline Safety Tips – Jumping for Joy without the Risk
- Trampoline Hole Repair Guide: Masterful Fixes for Unleashing Bouncing Power!
- Trampoline Ground Preparation: Mastering the Art of Bouncing Success
